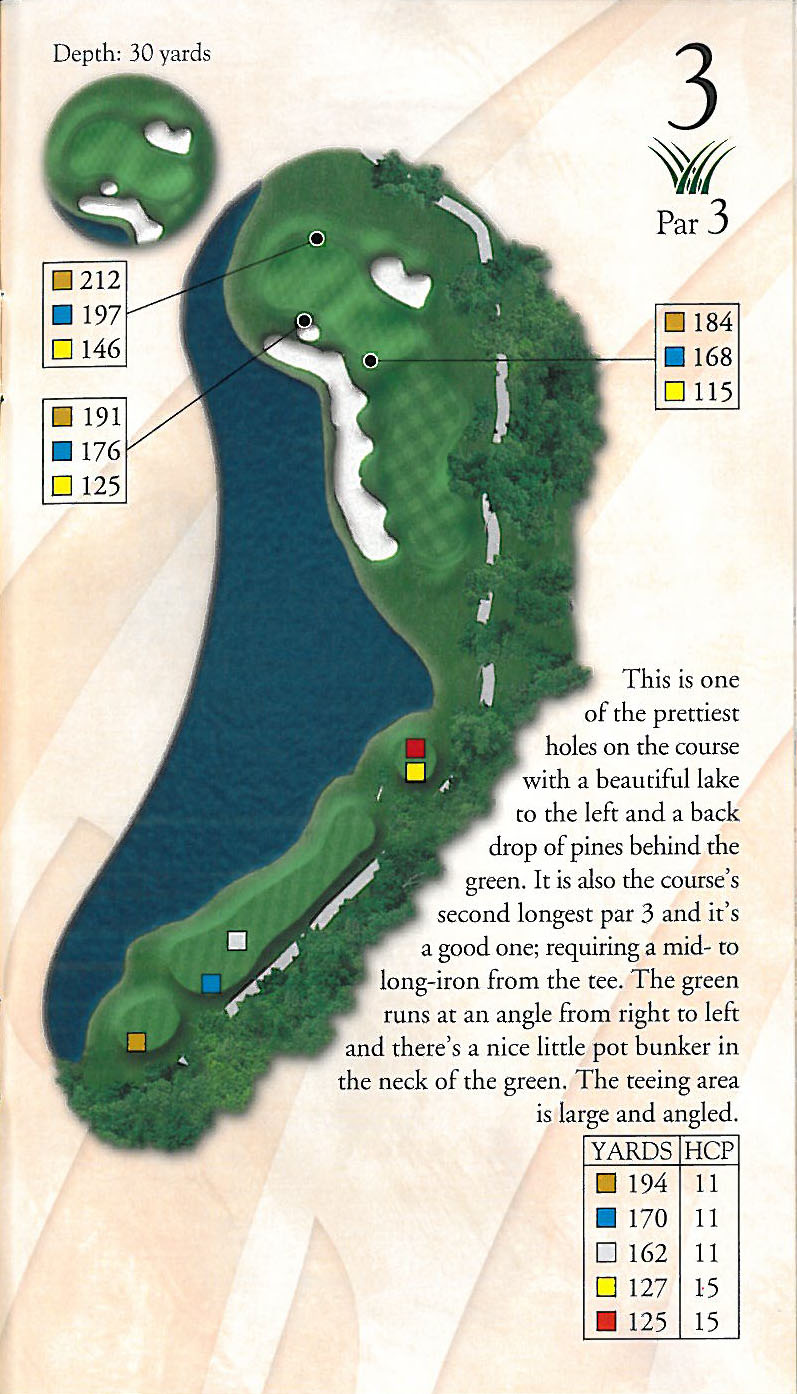
Take a Tour of the Course
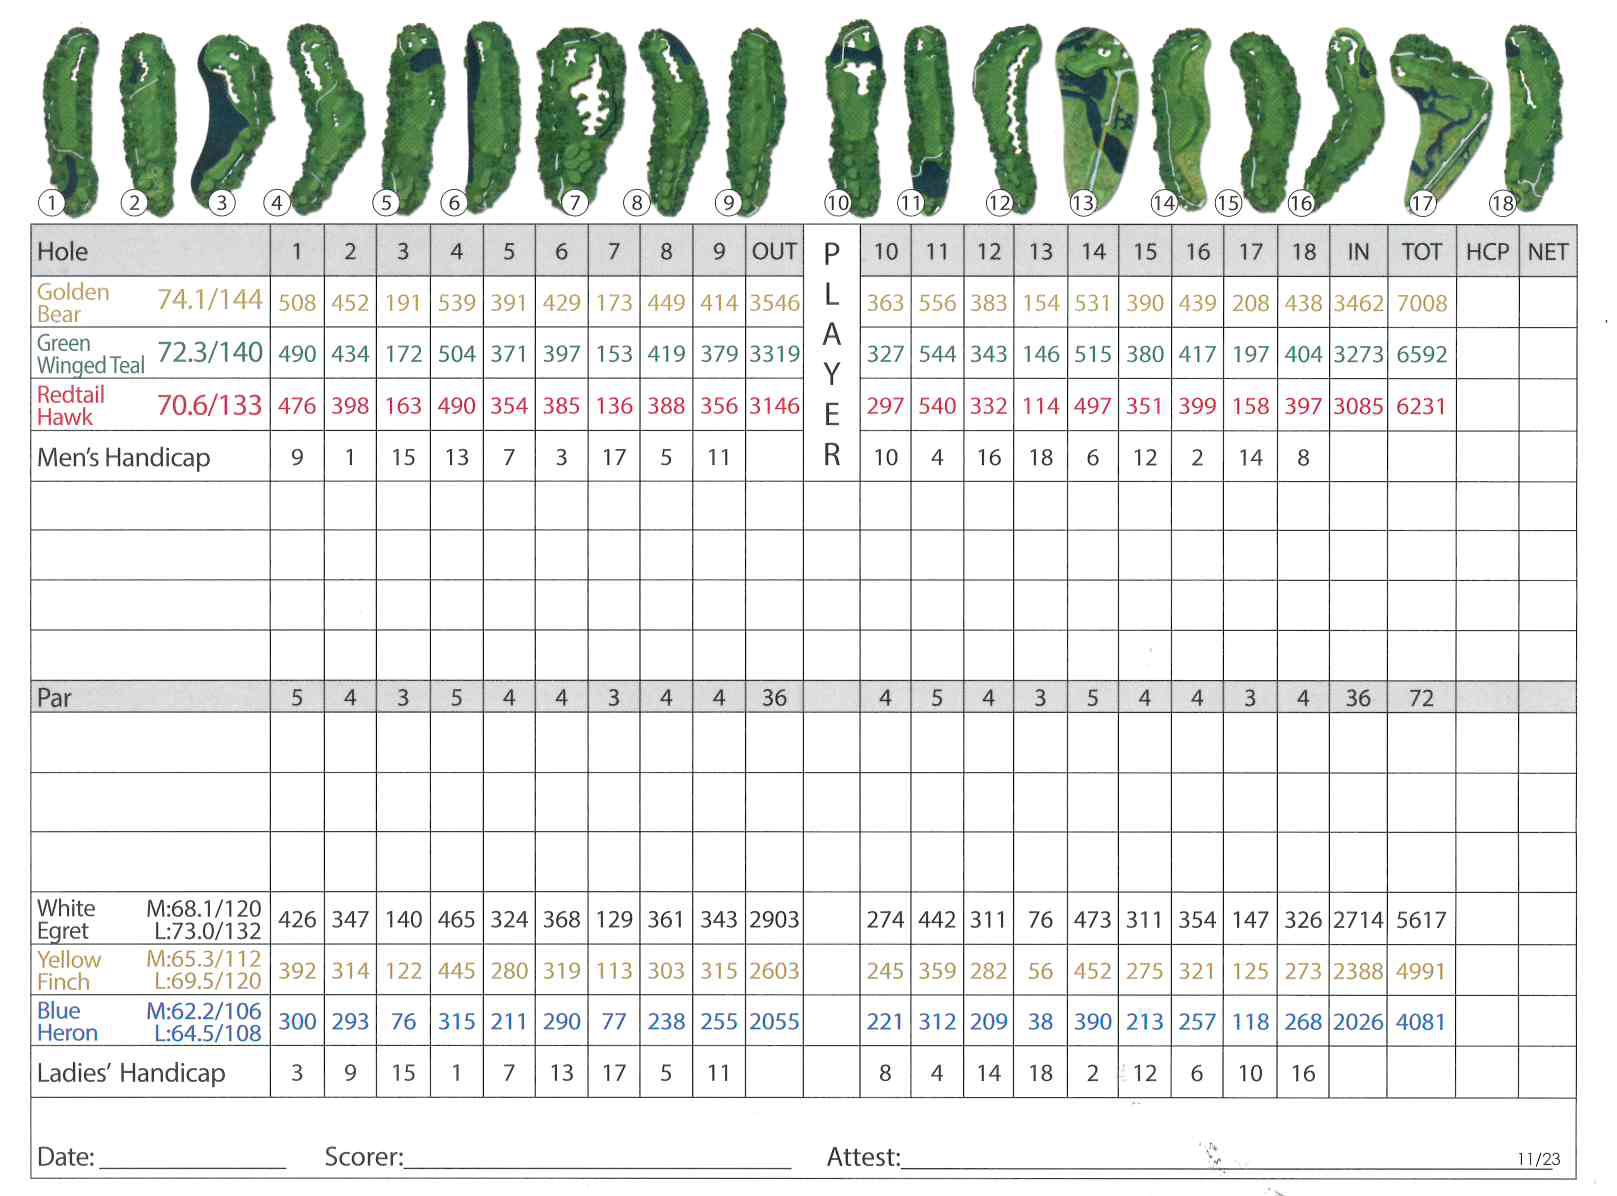
Hole 1
- Par 5
- 511 YDS
- HCP #9
- See Layout
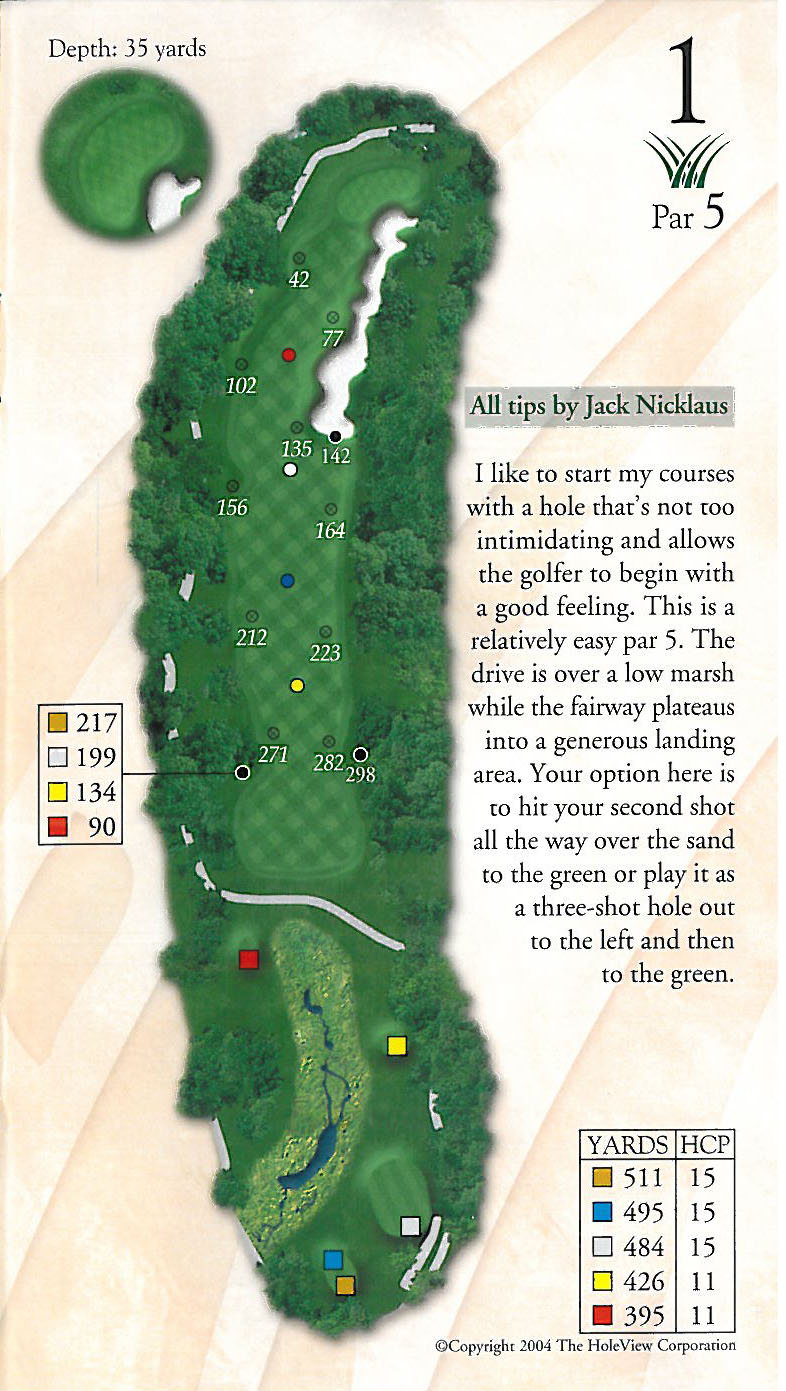
Hole 2
- Par 4
- 452 YDS
- HCP #1
- See Layout
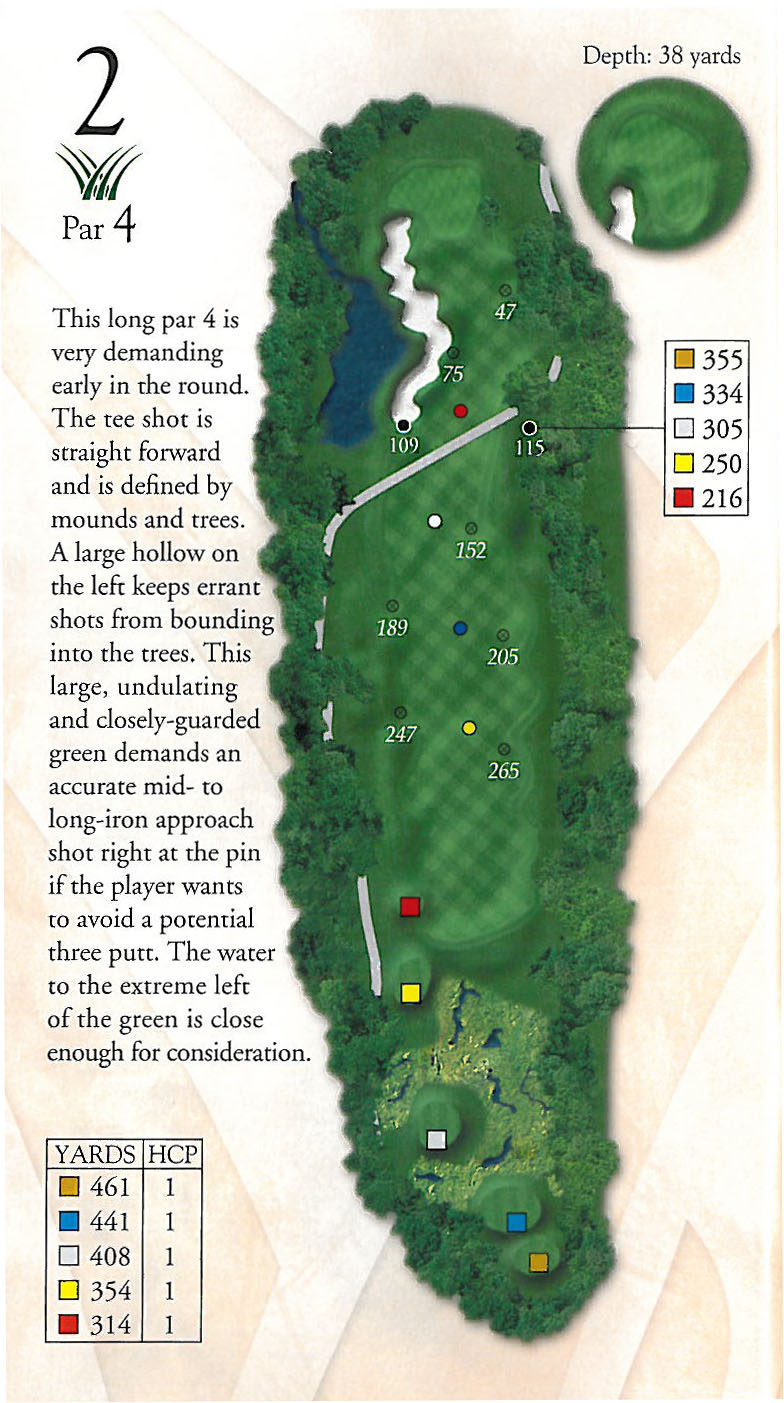
Hole 3
- Par 3
- 192 YDS
- HCP #15
- See Layout
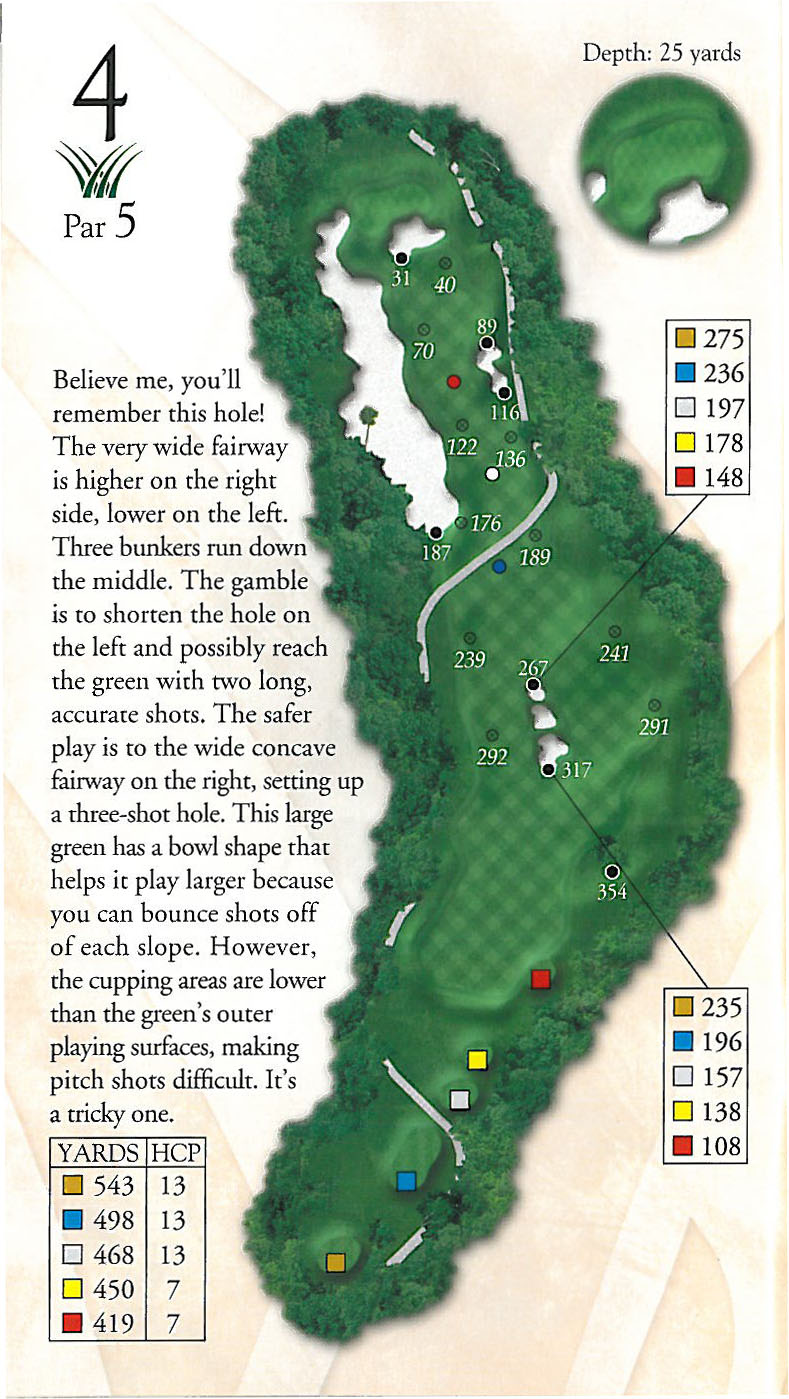
Hole 4
- Par 5
- 543 YDS
- HCP #13
- See Layout
Believe me, you’ll remember this hole! The very wide fairway is higher on the right side, lower on the left. Three bunkers run down the middle. The gamble is to shorten the hole on the left and possibly reach the green with two long, accurate shots. The safer play is to the wide concave fairway on the right, setting up a three-shot hole. This large green has a bowl shape that helps it play larger because you can bounce shots off of each slope. However, the cupping areas are lower than the green’s outer playing surfaces, making pitch shots difficult. It’s a tricky one.
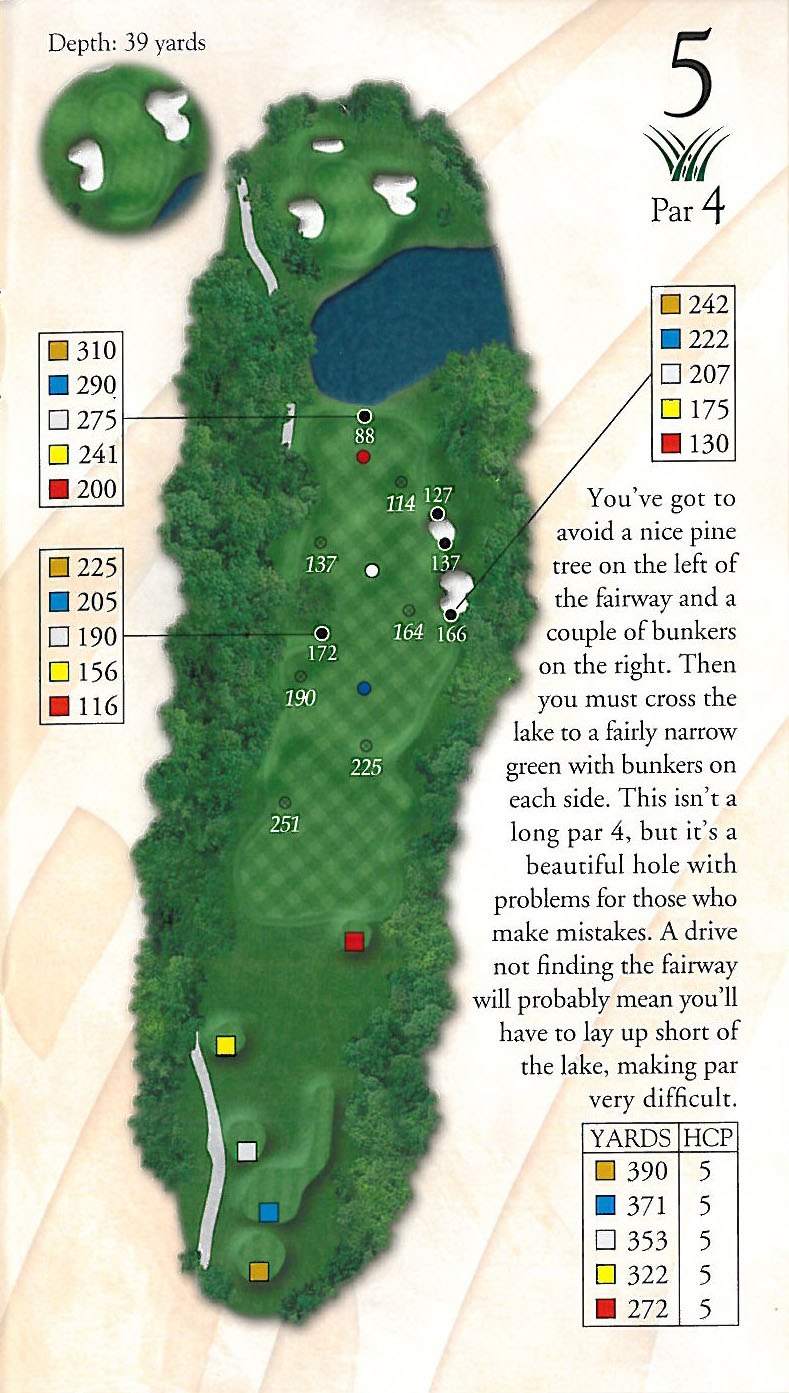
Hole 5
- Par 4
- 390 YDS
- HCP #7
- See Layout
You’ve got to avoid a nice pine tree on the left of the fairway and a couple of bunkers on the right. Then you must cross the lake to a fairly narrow green with bunkers on each side. This isn’t a long par 4, but it’s a beautiful hole with problems for those who make mistakes. A drive not finding the fairway will probably mean you’ll have to lay up short of the lake, making par very difficult.
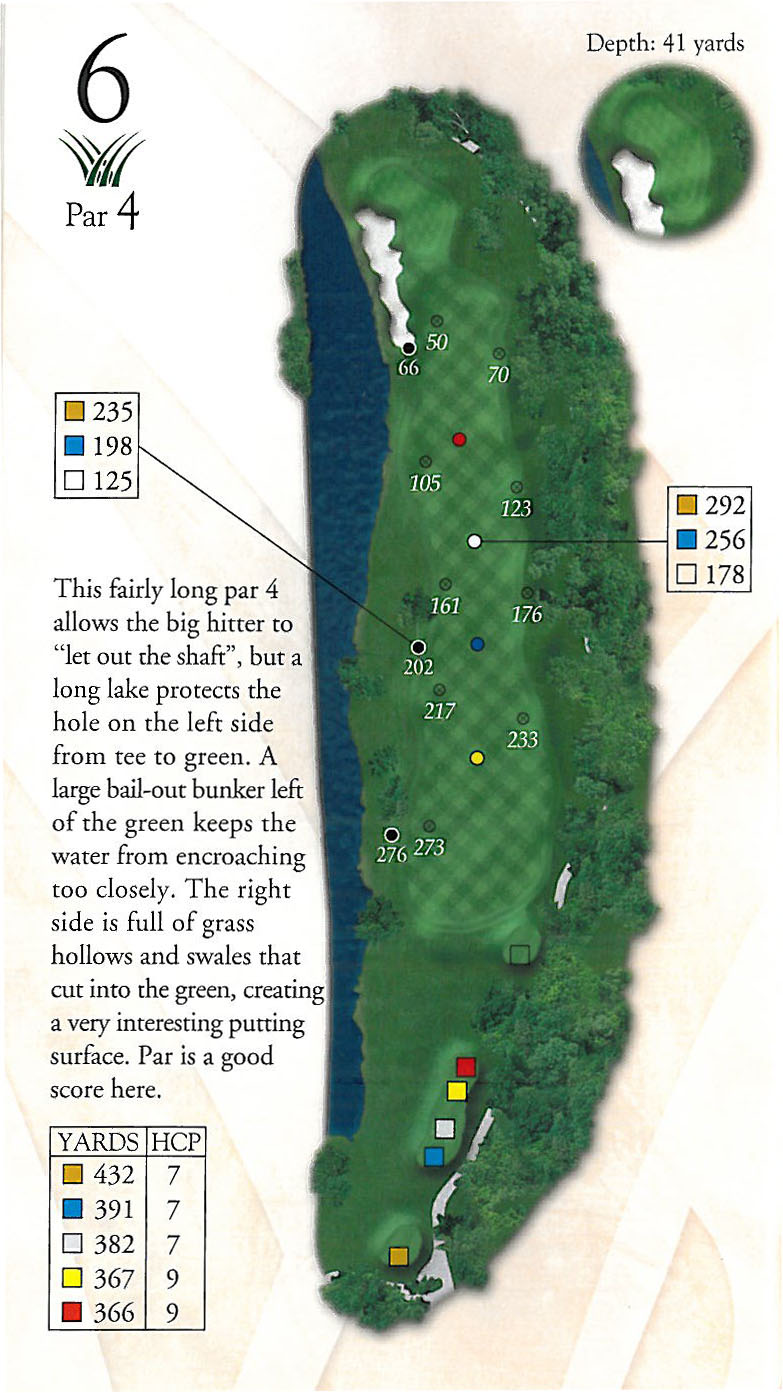
Hole 6
- Par 4
- 429 YDS
- HCP #3
- See Layout
This fairly long par 4 allows the big hitter to “let out the shaft,” but a long lake protects the hole on the left side from tee to green. A large bail-out bunker left of the green keeps water from encroaching too closely. The right side is full of grass hollows and swales that cut into the green, creating a very interesting putting surface. Par is a good score here.
Hole 7
- Par 3
- 172 YDS
- HCP #17
- See Layout
This is a neat par 3 the way it just sits in the natural setting. You’ve got the big bunker along the whole right side and a deep bunker along the left side. A mid-iron will be the club to this long, narrow green.
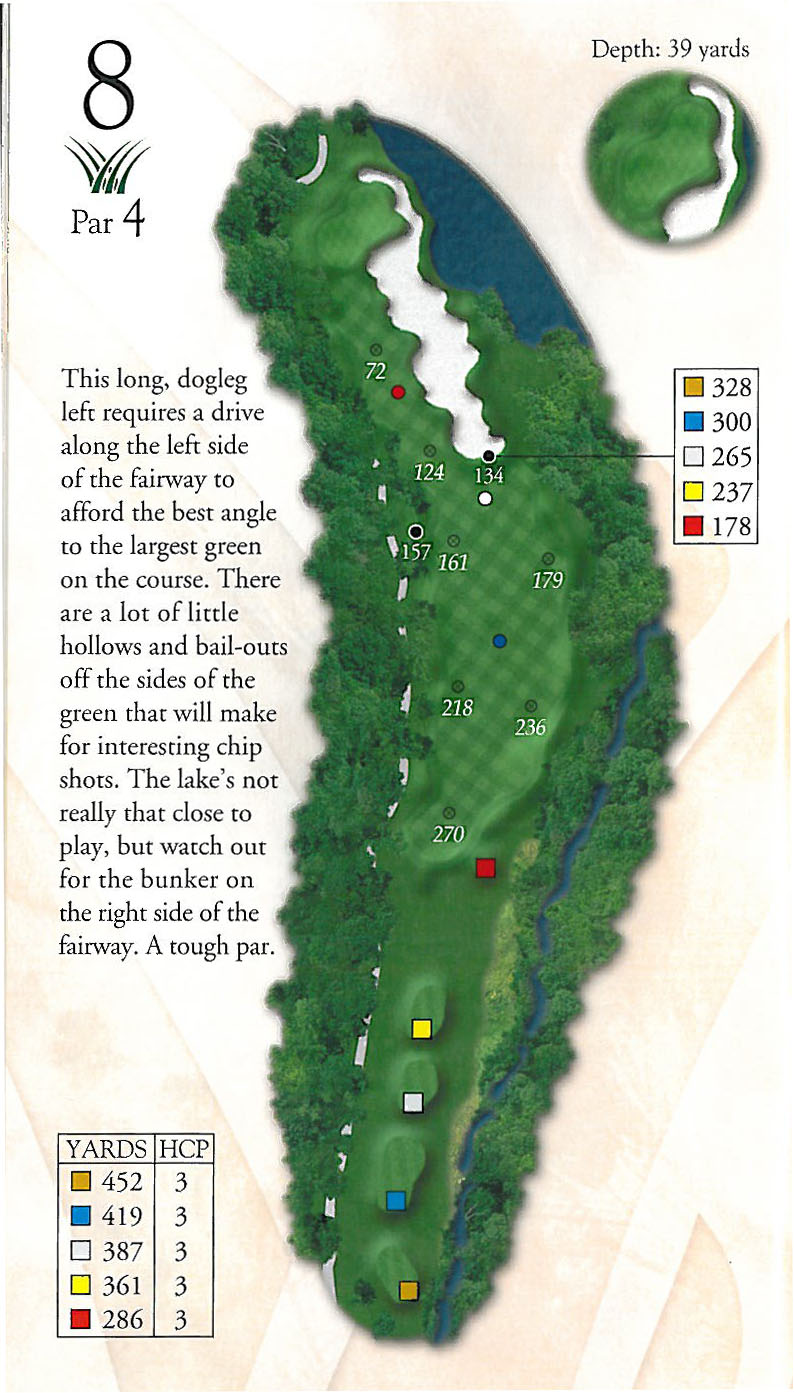
Hole 8
- Par 4
- 457 YDS
- HCP #5
- See Layout
This long, dogleg left requires a drive along the left side of the fairway to afford the best angle to the largest green on the course. There are a lot of little hollows and bail-outs off the sides of the green that will make for interesting chip shots. The lake’s not really that close to play, but watch out for the bunker on the right side of the fairway. A tough par.
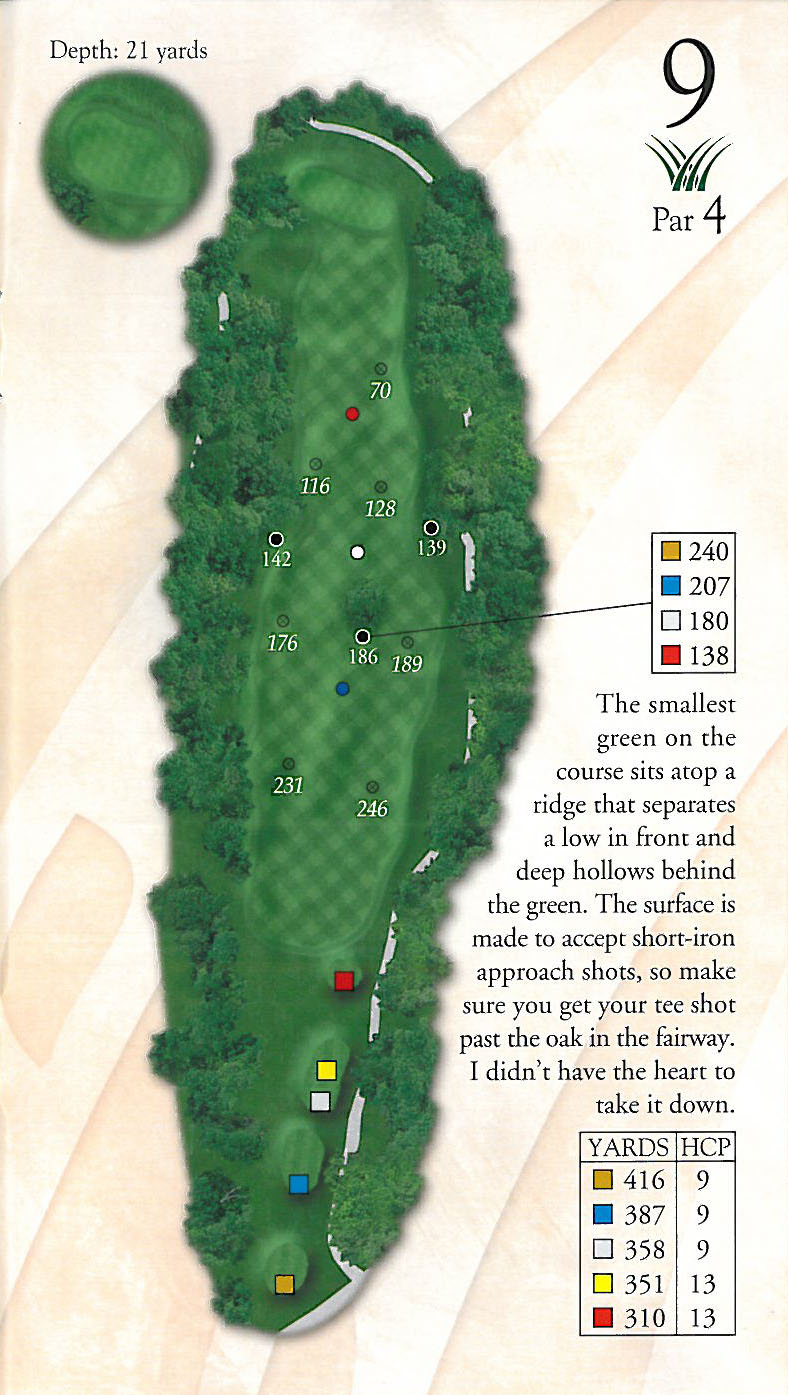
Hole 9
- Par 4
- 413 YDS
- HCP #11
- See Layout
The smallest green on the course sits atop a ridge that separates a low in front and deep hollows behind the green. The surface is made to accept short-iron approach shots, so make sure you get your tee shot past the oak in the fairway. I didn’t have the heart to take it down.
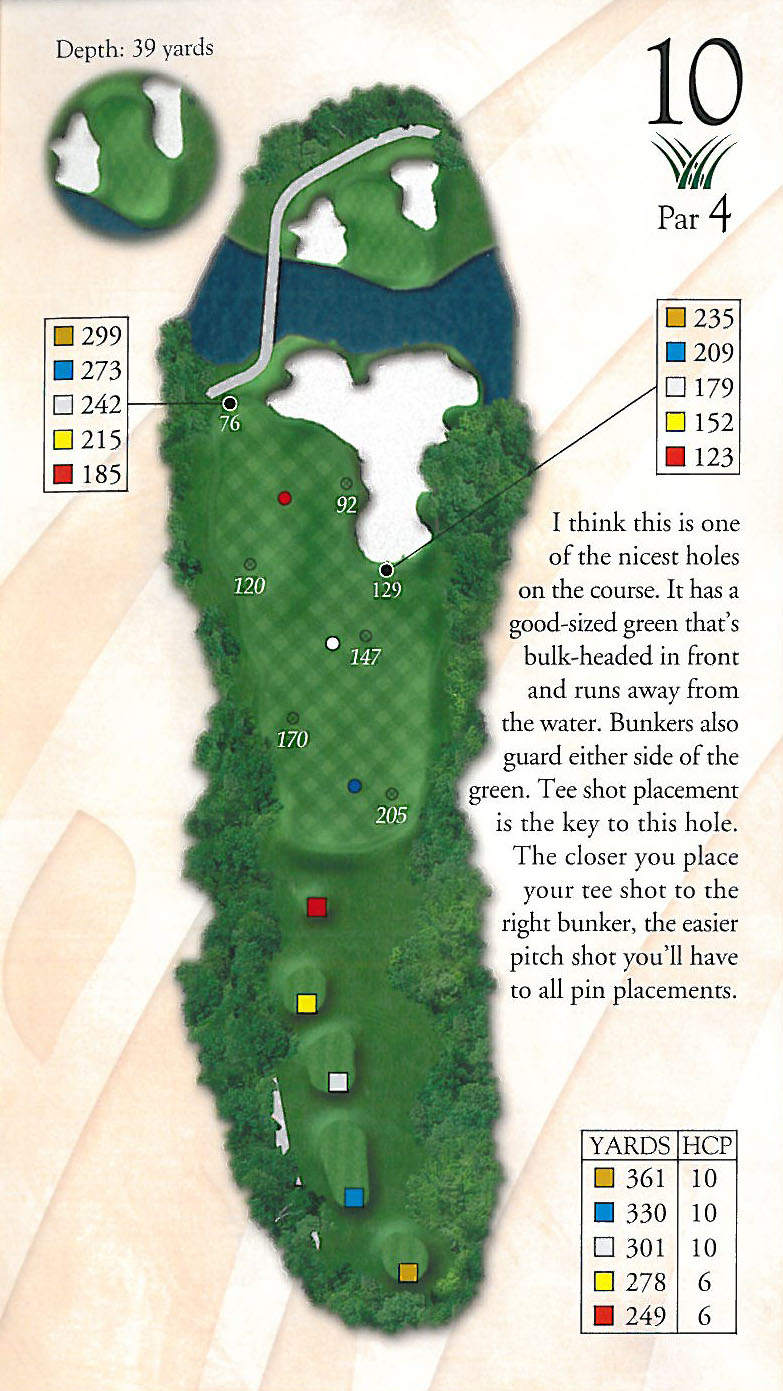
Hole 10
- Par 4
- 369 YDS
- HCP #10
- See Layout
I think this is one of the nicest holes on the course. It has a good-sized green that’s bulk-headed in front and runs away from the water. Bunkers also guard either side of the green. Tee shot placement is the key to this hole. The closer you place your tee shot to the right bunker, the easier pitch shot you’ll have to all pin placements.
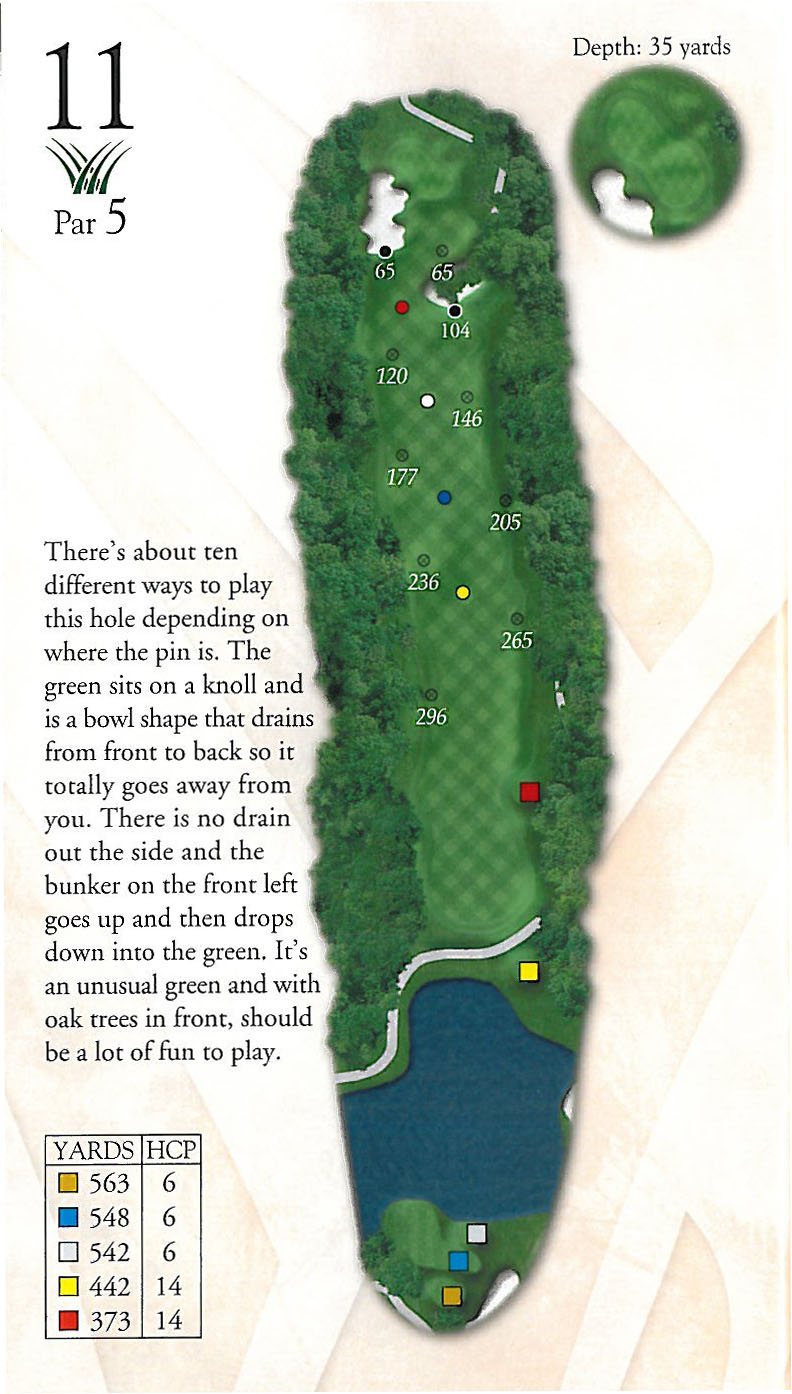
Hole 11
- Par 5
- 564 YDS
- HCP #4
- See Layout
There’s about ten different ways to play this hole depending on where the pin is. The green sits on a knoll and is a bowl shape that drains from front to back so it totally goes away from you. There is no drain out the side and the bunker on the front left goes up and then drops down into the green. It’s an unusual green and with oak trees in front, should be a lot of fun to play.
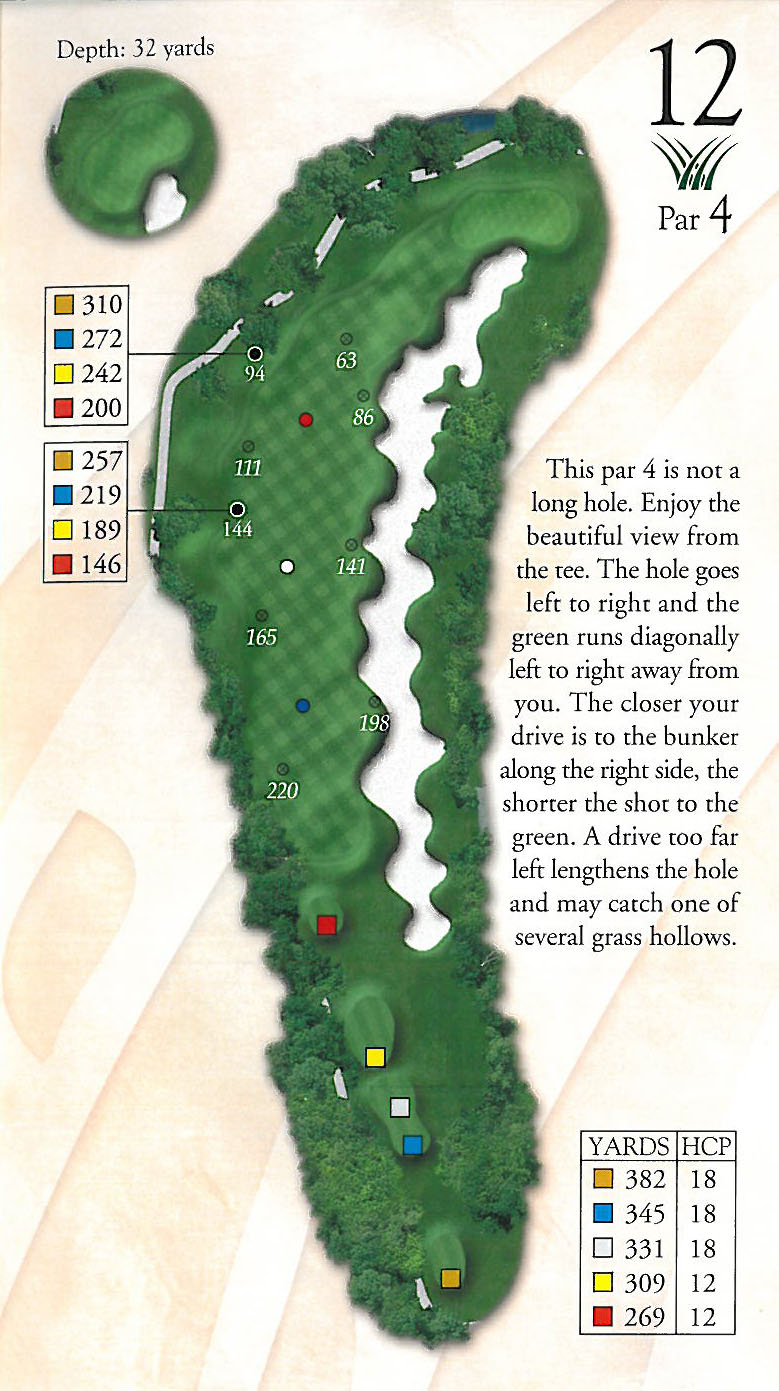
Hole 12
- Par 4
- 383 YDS
- HCP #16
- See Layout
This par 4 is not a long hole. Enjoy the beautiful view from the tee. The hole goes left to right and the green runs diagonally left to right away from you. The closer your drive is to the bunker along the right side, the shorter the shot to the green. A drive too far left lengthens the hole and may catch one of several grass hollows.
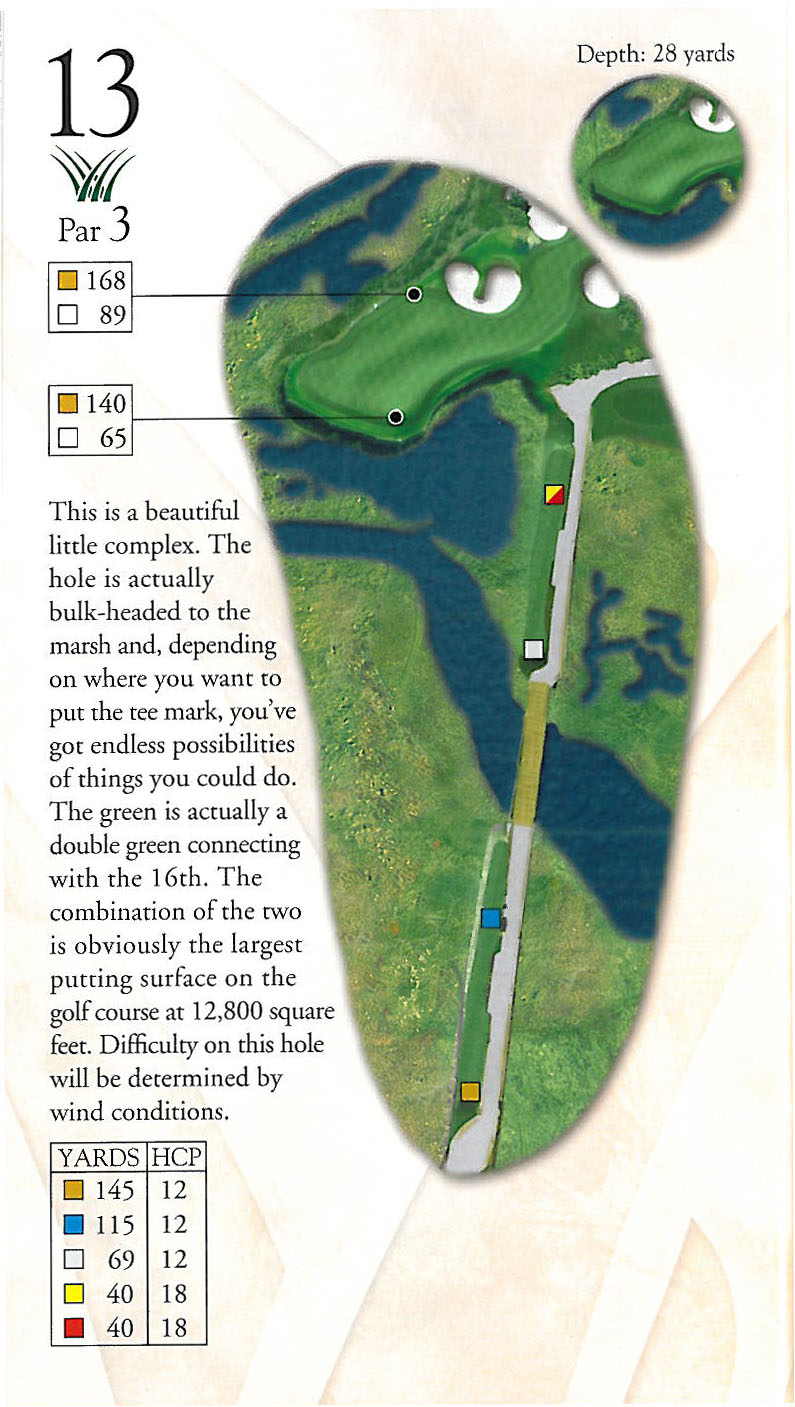
Hole 13
- Par 3
- 149 YDS
- HCP #18
- See Layout
This is a beautiful little complex. The hole is actually bulk-headed to the marsh and, depending on where you want to put the tee mark, you’ve got endless possibilities of things you could do. The green is actually a double green connecting with the 16th. The combination of the two is obviously the largest putting surface on the golf course at 12,800 sq ft. Difficulty on this hole will be determined by wind conditions.
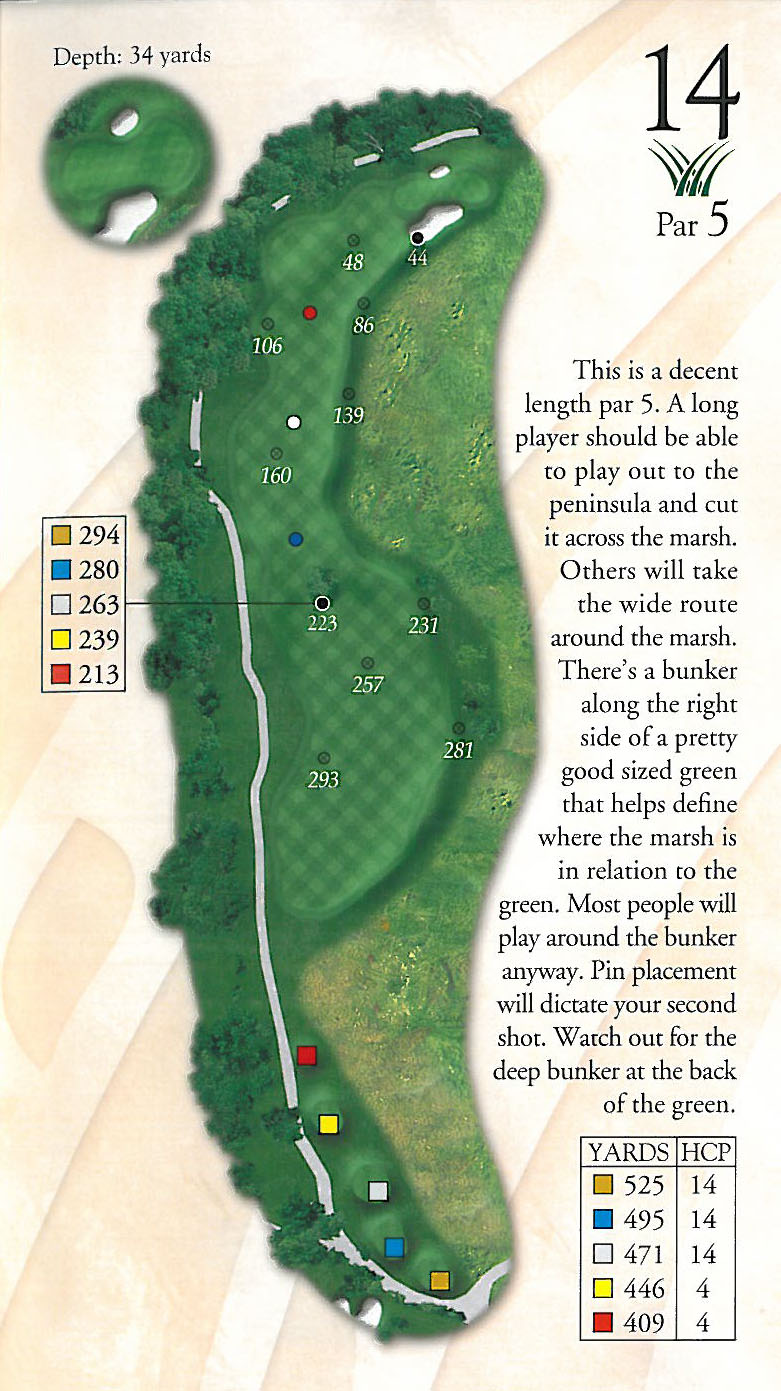
Hole 14
- Par 5
- 528 YDS
- HCP #6
- See Layout
This is a decent length par 5. A long player should be able to play out to the peninsula and cut it across the marsh. Others will take the wide route around the marsh. There’s a bunker along the right side of a pretty good sized green that helps define where the marsh is in relation to the green. Most people will play around the bunker anyway. Pin placement will dictate your second shot. Watch out for the deep bunker at the back of the green.
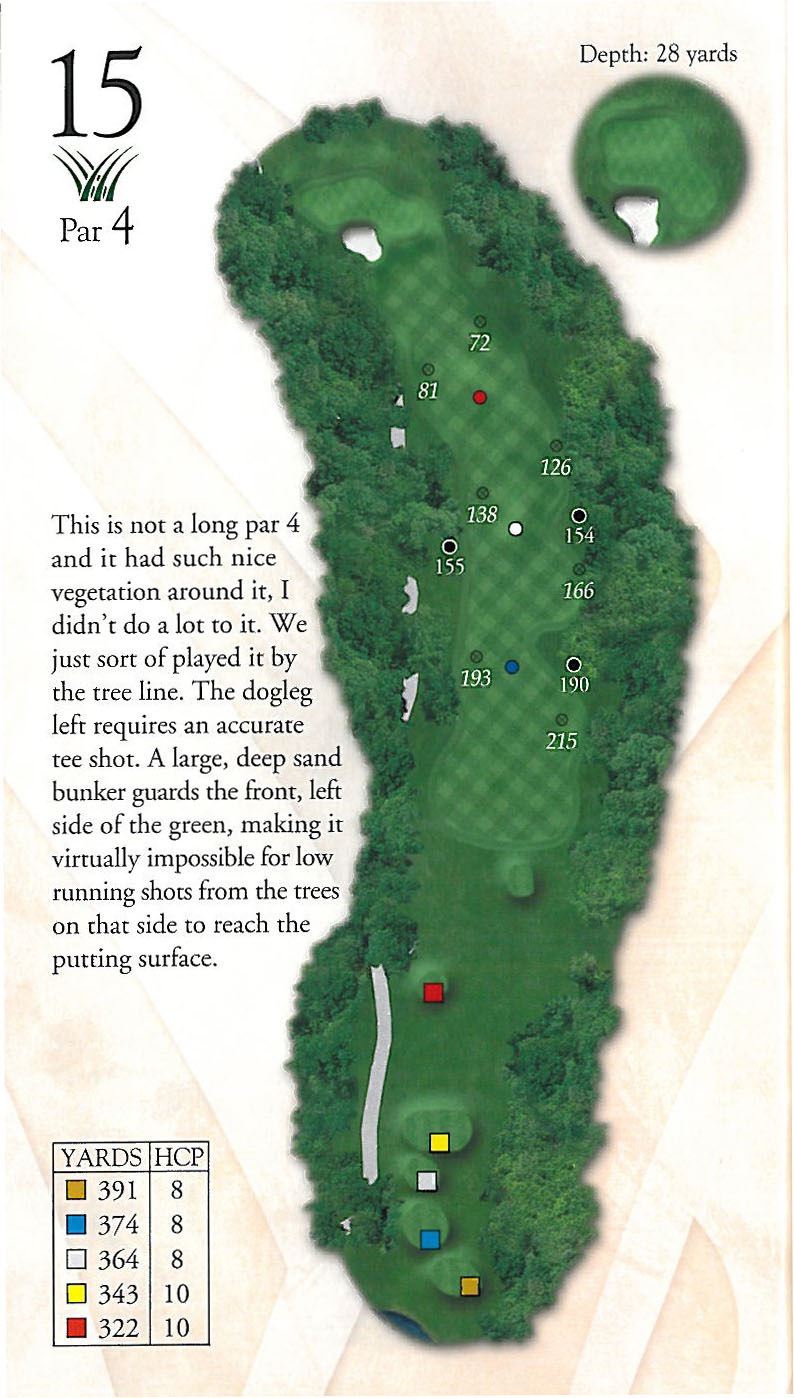
Hole 15
- Par 4
- 386 YDS
- HCP #12
- See Layout
This is not a long par 4 and it had such a nice vegetation around it, I didn’t do a lot to it. We just sort of played it by the tree line. The dogleg left requires an accurate tee shot. A large, deep sand bunker guards the front, left side of the green, making it virtually impossible for low running shots from the trees on that side to reach the putting surface.
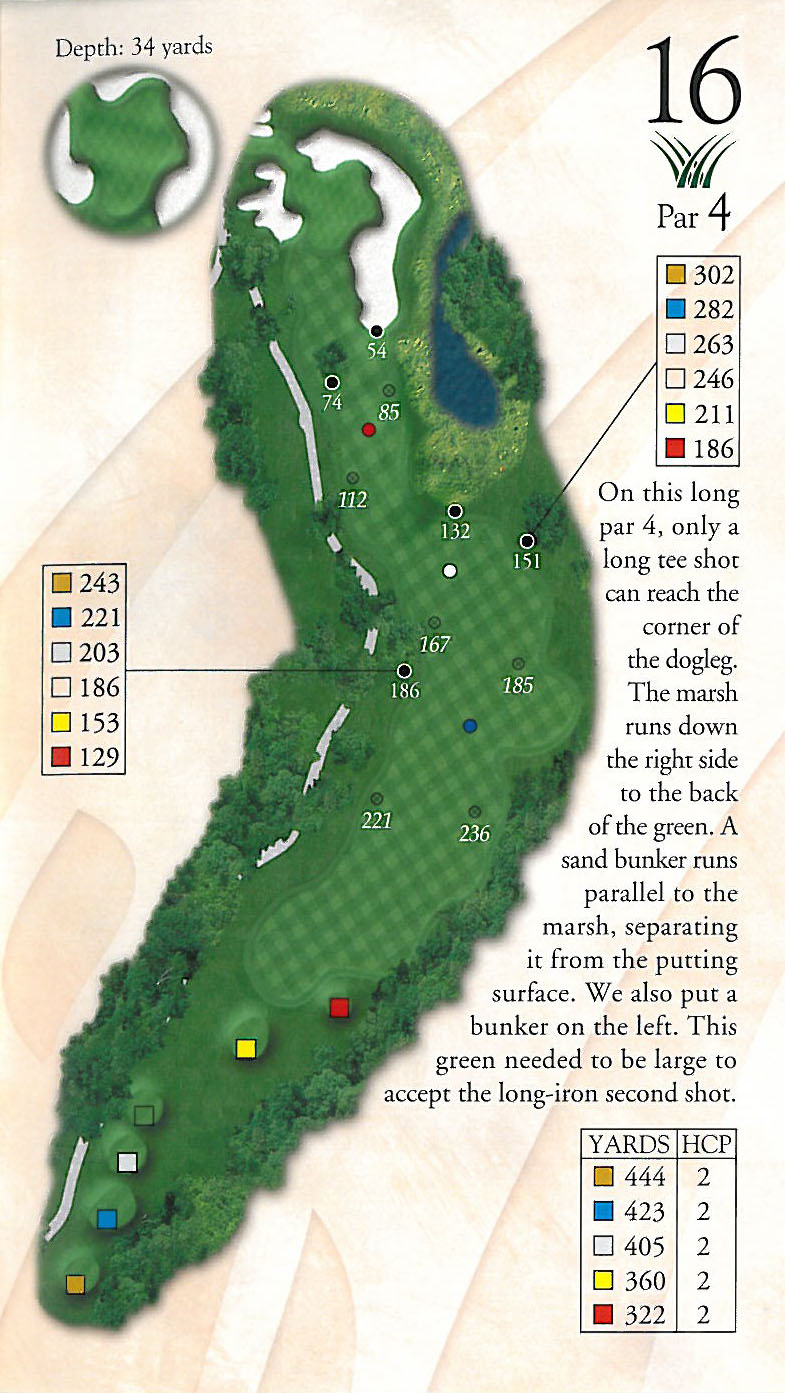
Hole 16
- Par 4
- 440 YDS
- HCP #2
- See Layout
On this long par 4, only a long tee shot can reach the corner of the dogleg. The marsh runs down the right side to the back of the green. A sand bunker runs parallel to the marsh, separating it from the putting surface. We also put a bunker on the left. This green needed to be large to accept the long-iron second shot.
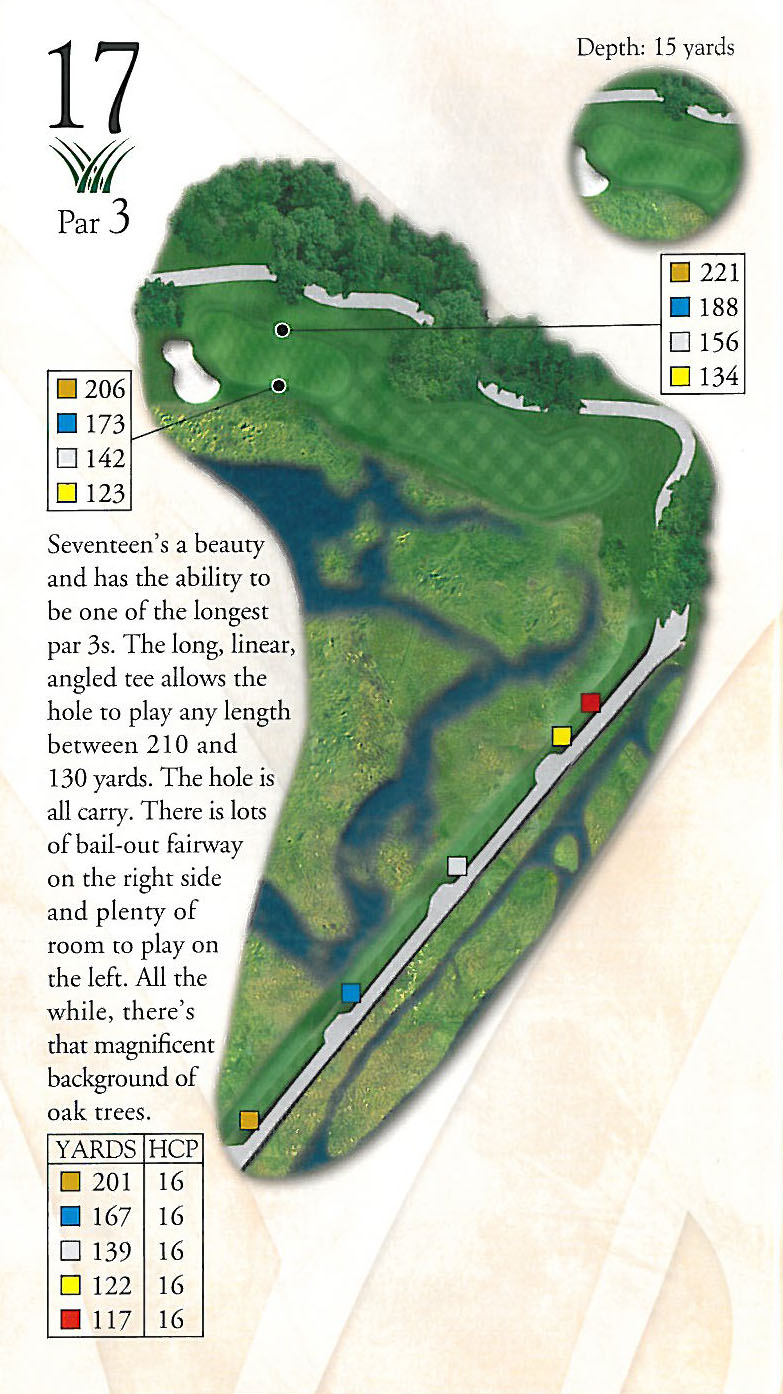
Hole 17
- Par 3
- 213 YDS
- HCP #14
- See Layout
Seventeen’s a beauty and has the ability to be one of the longest par 3s. The long, linear, angled tee allows the hole to play any length between 210 and 130 yards. The hole is all carry. There is lots of bail-out fairway on the right side and plenty of room to play on the left. All the while, there’s that magnificent background of oak trees.
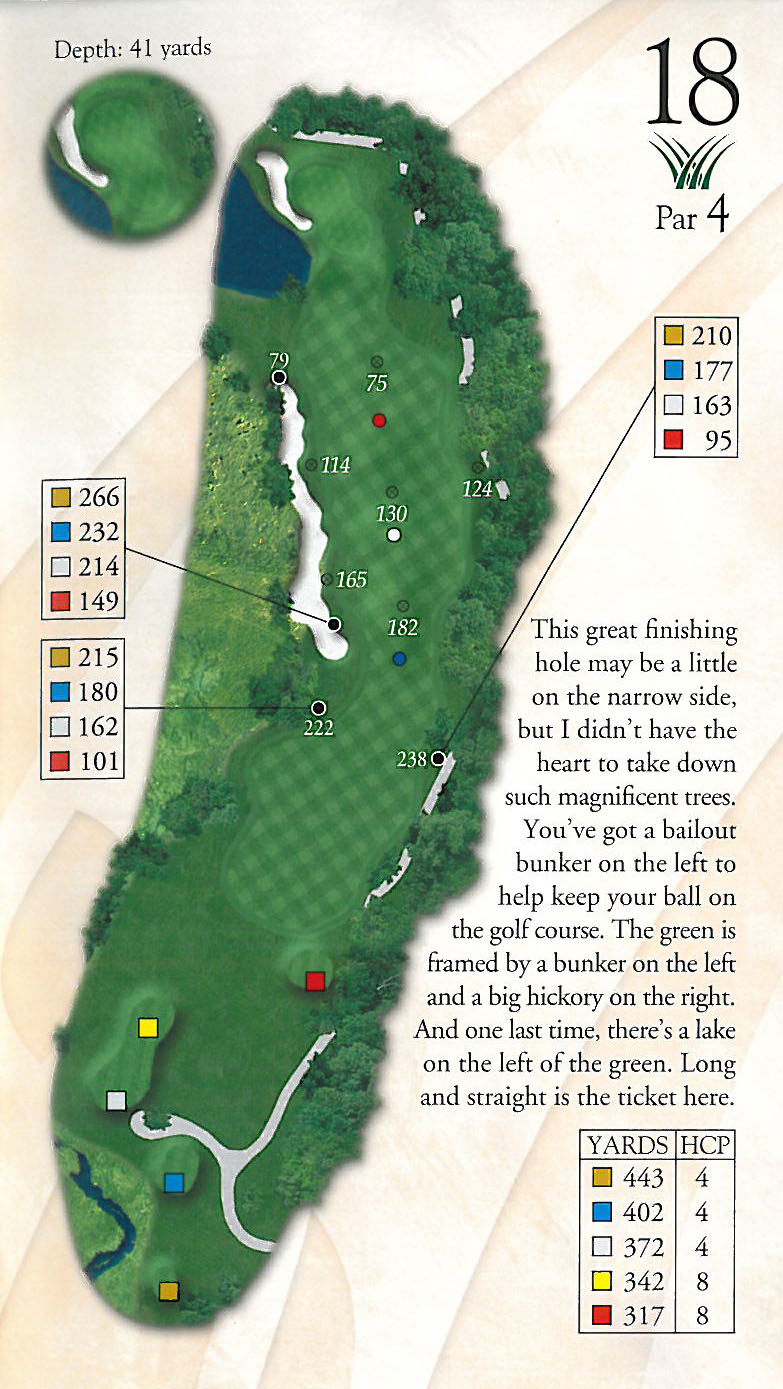
Hole 18
- Par 4
- 435 YDS
- HCP #8
- See Layout
This great finishing hole may be a little on the narrow side, but I didn’t have the heart to take down such magnificent trees. You’ve got a bailout bunker on the left to help keep your ball on the golf course. The green is framed by a bunker on the left and a big hickory on the right. And one last time, there’s a lake on the left of the green. Long and straight is the ticket here.